If you were to look for the term searing in the dictionary, you would see something along the lines of to char or burn a surface.
Similar to the intense heat of the sun, searing is a cooking technique that requires intense flames of the fire.
Searing is particularly important for individuals who love to cook and grill. You may have heard the term searing before, but do you really know what it means.
Contents
What Is Searing?
In short, searing refers to using exposing foods to high intense heat for short bursts of time.
The ideal temperature for searing food is typically 500°F.
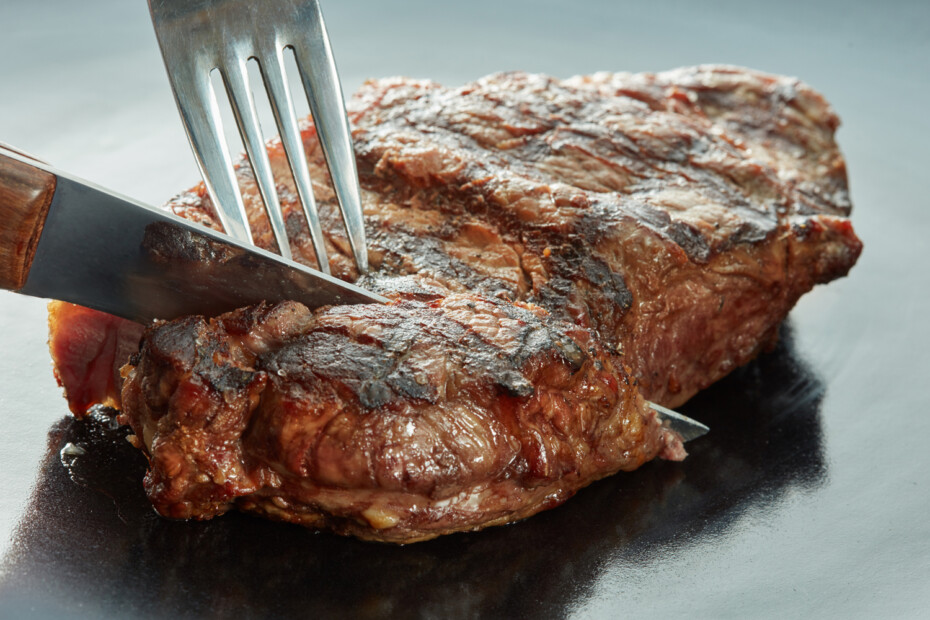
The theory behind searing foods is to cook the outside quickly, which allows it to develop a stunning rich golden crust.
In addition to this, if the food is thin enough, searing can cook the food completely.
However, you can also transfer the food to a low heat environment like the oven or a slow cooker to complete the cooking process.
Apart from the beautiful color that searing creates, it also gives food an appetizing aroma,
Why Should I Sear Meat?
In short, searing meat increases the aesthetic feel of the meat and enhances the flavor. I
t undergoes several chemical reactions when meat hits the surface of a hot skillet, pan, or grill.
The most famous of these reactions is the Millard reaction.
Essentially when the meat comes into contact with high heat, the proteins on the meat’s interior breaks down into amino acids.
This triggers the amino acids to interact with the meat’s sugar transforming its color from red to a rich golden brown.
The chemical reactions simultaneously release a pleasant aroma that makes you salivate while enhancing the flavor of the meat.
The meat will retain the newly acquired flavor even when you are finished searing.
If you are transferring your meat to an indirect heat source to finish cooking, the seared flavor will pair perfectly with the steak’s natural flavor.
This will result in a flavor and aroma due that is irresistible.
Does Searing Seal in the Meats Juices?
Have you ever heard that searing meat seals in moisture? While some people live by this rule, others believe that it is pointless.
People who subscribe to this searing theory believe that searing meat is relatively has no effect on moisture loss.
A German chemist named Justus Von Liebig came up with this theory in 1847.
As the story goes, Liebig thought that searing meat created an exterior barrier, therefore sealing in its juices and preserving its moisture content.
The famous French food journalist Auguste Escoffier mentioned this method in his article in 1902, which caused it to gain even more traction.
This method continued to be popularized until 1930 when the University of Missouri debunked it. Approximately two-thirds of meat is water.
As the meat cooks, most of its water evaporates or oozes out of the meat, and there’s no way we prevent the meat from losing its moisture.
In some instances, seared meats may lose more moisture than meat that is not seared.
Nonetheless, many chefs and home cooks still believe in this method and use it in the hopes of preventing their meat from losing moisture.
What’s the Difference Between Browning and Searing?
Most people have heard of the term browning. However, it is not the same thing as searing.
Browning refers to a chemical reaction, while searing refers to the cooking method.
For example, a Millaird reaction is a form of browning. However, there is also another chemical reaction that’s responsible for browning food called caramelizing.
Though it is not necessarily browning, caramelizing happens when sugars and carbohydrates in food come into contact with heat. However, this process occurs without proteins.
Caramelization typically occurs in vegetables, while browning occurs in meat.
Can I Sear Meat in Butter?
Butter is certainly a wonderful ingredient. However, it is not the ideal ingredient for searing meats. Butter has a low smoke point which means it will burn quickly and ruin the flavor of your meat.
If you wish to add a good buttery flavor to your steak, baste your steak with butter during the final minutes of cooking time.
Never start the searing process with butter.
What’s the Best Oil To Sear Meat With?
Oils are the ideal ingredient for searing meats. Unlike butter, some oils have a higher smoke point and a neutral flavor, which dies not overpower the steak’s beefy flavor.
However, not all oils are the ideal candidate for searing meats. It’s best to stick with refined oils, which typically have a higher smoke point.
Canola, safflower, grape seed, peanut, and avocado oils are ideal for searing.
Is It Best To Sear Meat Before or After Cooking?
Truthfully, the answer depends on the circumstance. For example, if you sear a thin cut of meat, it will probably be cooked by the end of the searing process.
On the other hand, if your cut of meat is thicker, searing it firsts creates a rich flavorful golden crust on the outside of the meat before it is cooked fully on the interior.
The meat is then cooked thoroughly using another cooking technique.


Tips for Searing Meat
Remove your meat from the refrigerator at least 30 minutes in advance before searing the meat.
This gives the meat ample time to allow its moisture to reabsorb into the meat instead of becoming trapped within the fibers of the meat.
Pepper
Do not add pepper to your steak before it is cooked thoroughly. Pepper carbonizes while your meat is searing and gives your meat a bitter aftertaste.
Temperature
Searing foods require high temperatures, which means your pan your skillet is extremely hot. Stainless steel or cast-iron skillets are the ideal tools for searing.
Marinade
If you marinate or brine your meat, do not add more salt. As you can imagine adding more salt means a salty cut of meat, and no one enjoys eating over-salted meat.
Simply pat your steaks dry to remove any excess marinade or wash it to remove some of the saltiness from the brine.
Even if you do not use a marinade or brine, always pat your meat dry.
Water on the surface of the meat can transform into steam which means the meat will lift easily rather than sticking to the pan’s surface and becoming golden brown.
In addition to this, not drying your meat may also result in uneven searing, or it could even decrease the pan’s temperature.
Patting the meat dry decreases the chances that the meat will be steamed rather than seared.
Pan Management
Under no circumstances should you crowd the pan when searing meat. If you are cooking a large cut of meat, ensure the pot is large enough to sear the meat in.
However, if you are searing meat for a stew or searing a steak, leave at least 2-3-inches of space between the peat.
This will ensure your meat is seared rather than steamed.
Do not move the meat once you place it into the skillet or pot. It’s natural to want to look at the progress of your meat.
This is only appropriate to peek at food if you are sauteing it.
For your meat to achieve the perfect sear, you need to let your meat sit uninterrupted for at least 2-3 minutes per side.
You will know when your meat is seared when it easily releases from the surface of the pan.
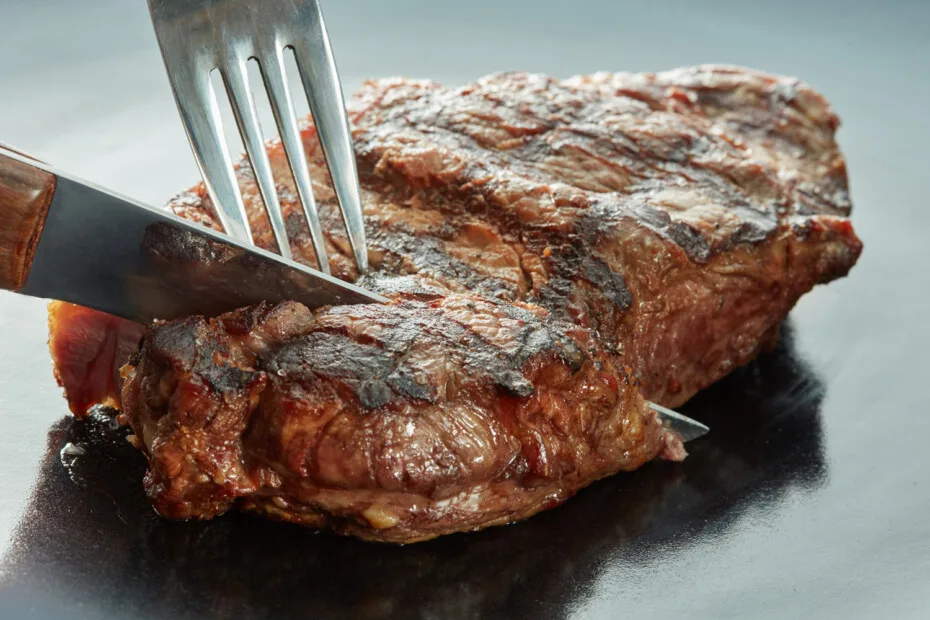
In addition to this, do not use a fork to turn your meat. The fork penetrates the flesh of the meat, which allows more moisture to escape.
Furthermore, use tongs or a spatula to turn your meat over while you are searing it.
Stock
Do not waste the flavorful morsels that are left in the pan, especially if you are making a stew or braised meat.
Deglaze the pan with vegetable, beef, or chicken stock, wine, or water. You can use this flavorful deglazing liquid as a base for your sauces or gravies.
How To Sear Meat?
Searing meat can be done in a pan/skillet or on the grill. To sear your meat in a pan, pat your meat dry with paper towels, then season it with your preferred seasoning.
Preheat your cast-iron skillet for 3-4 minutes over a medium-high flame until it is scorching hot.
Add your preferred oil and swirl it around the skillet, and heat it for another minute.
Carefully place your meat into the skillet, making sure not to overcrowd the pan, and allow the meat to sear for 2-3 minutes without moving it.
Once your meat reaches your preferred level of golden brown, turn it over and cook it for an additional 2-3 minutes.
When both sides of your meat are seared, turn it on its sides to sear the entire cut of meat with a pair of tongs.
At this point in the cooking process, thinner meats will be finished cooking, while thicker meats will need to be moved to a different heat source to be cooked thoroughly.
Let your meat rest 10 minutes before carving.
To sear your meat on a grill, heat for a minimum of 20 minutes before cleaning it with a grill brush to rid the grill of any debris from the grills grates.
Let your meat sit on the countertop at room temperature for at least 30 minutes in advance before cooking it.
Whether you are searing a steak or a roast, pat your meat dry with paper towels, then season it with your preferred seasoning.
Once your grill achieves a temperature of 500°F, add your meat to the cooking grates and let it sear for 2-3 minutes with the lid off.
Turn your meat over and cook it for an additional 2-3 minutes until it has your preferred hue of golden brown.
Ensure your steak reaches your desired internal temperature before removing it from the grill. Like searing meat in a pan or skillet, thinner meats will be completely finished.
On the other hand, thicker meats may require you to place the lid on the grill to allow the meat to cook completely.
Alternatively, you can also transfer your meat to another heat store to cook completely.
As with thinner cuts, make sure your meat is at your preferred temperature before removing it from the grill or oven. Let the seared meat rest for 10 minutes before carving.
Reverse Sear
Alternatively, you can also reverse meat. This concept is particularly useful for thicker steaks such as porterhouse or ribeyes.
It is believed to create a more evenly cooked steak rather than the traditional way of cooking steaks.
To reverse sear your steak, arrange it on a wire rack and bake it at a low temperature until it reaches your desired doneness.
Remove the steak from the oven and allow it to rest for at least 5-10 minutes.
Heat your preferred oil in a cast-iron skillet, and once it is scorching hot, sear the steak for 1 minute on each side.
Reverse searing steaks create a tender interior with a crisp, golden-brown flavorful exterior.
Final Thoughts
Ever sliced into a seared steak and been blown away by the flavor. As the saying goes, you eat with not only your mouth, but you eat with your eyes also.
Searing creates a rich nutty yet savory flavor that leaves you longing for more seared meats.
Whether you are a home cook, a novice, or a professional chef, searing meat is a technique everyone should master.
Though it takes a few trial cooking sessions to get the hang of it once you have searing down packed, your meats will never be the same.
Not only will it enhance the flavor and appearance of your food, but it is a nifty way of tricking your family and friends into believing you are a master chef.
Go forth and sear all your meats for maximum flavor!


I have been smoking and grilling meat from an early age and enjoy sharing my knowledge and expertise through the hundreds of articles I have written about BBQ. I hope to make everyone’s BBQ journey that little bit easier.